Next.js App Router 환경에서
removeChild에러가 발생하는 현상을 분석하고, 근본 원인 및 실질적인 해결 방법을 안내합니다.
1. 에러 현상 개요
Next.js 기반의 서비스에 외부 라이브챗 서비스를 연동한 후, 페이지 이동시 global-error 페이지로 떨어지는 형상이 발생했다.
또한, Sentry와 같은 APM 도구에서는 다음과 같은 형태로 에러가 포착:
TypeError: Cannot read properties of null (reading 'removeChild')

incomplete-app-router-transaction
단순히 외부 라이브챗 스크립트를 적용했을 때만 발생하는 현상이었으므로, 외부스크립트의 동작이 원인일 것으로 예측하였다.
2. 현상 파악 과정
과거에도 동일한 에러를 본적이 있고, 그때 스크립트가 우리 서비스의 DOM 요소를 수정하여서 발생한 에러였다.
이 경험을 통해, 외부 스크립트가 DOM 변화를 발생시키는지 확인하기로 함.
2-1)실제 DOM 변화 관찰
크롬 개발자도구의 Elements 탭을 통해 다음과 같은 DOM 조작을 확인했다:
- 외부 라이브챗 스크립트가 기존 <title>을 제거하고 새롭게 생성
- favicon 용 <link> 태그 일부가 교체됨

이러한 조작이 App Router의 DOM 관리 방식과 충돌을 일으킨 것으로 추정.
3. 원인 분석 : 왜 removeChild 오류가 발생하는가?
🔧 Next.js App Router의 <head> 처리 방식
Next.js의 App Router(React 18 기반)는 <title>, <meta>, <link> 등의 태그를 "hoistable elements" 로 취급합니다.
- 최초 렌더 시 해당 요소를 <head>에 추가
- 이후 라우팅이 변경될 때 React 내부의 diff 알고리즘이 기존 요소와 비교하여 removeChild 또는 appendChild를 호출
이때 React는 이전 <head> 요소의 참조를 캐싱하고 있기 때문에, 외부 스크립트가 이를 임의로 삭제하거나 교체하면 parent.removeChild(node) 호출 시 다음과 같은 오류가 발생합니다:
📌 관련 이슈: Vercel Discussions #52625
Cannot read properties of null (reading 'removeChild') with App directory and Intercom · vercel next.js · Discussion #52625
Summary I am having a Next.js (App directory) project which uses Intercom. When I open a page on mobile, open/close the intercom, and then navigate to a new page. I am having Cannot read properties...
github.com
😱 외부 스크립트의 직접 DOM 조작
- 라이브챗 위젯은 실행 중에 document.head 내부의 <title> 및 favicon <link> 태그를 직접 수정하거나 교체
- React는 기존 요소에 대한 참조를 유지하고 있으므로, 라우팅 전환 시 parentNode가 null인 노드를 제거하려고 시도 → 예외 발생
4. 해결 전략 및 옵션
| 전략 | 장점 | 단점 |
| A. 라이브챗이 <head>를 수정하지 않도록 설정<br/>예: disable-favicon-badge, hide_default_launcher 등의 옵션 활용 | 가장 단순하고 안정적<br/>Next.js의 DOM 관리 규칙을 준수 | 옵션이 없는 위젯에서는 불가능 |
| B. 위젯을 React 컴포넌트 안에서 mount/unmount 관리<br/>전용 Provider 및 useEffect를 통해 상태 관리 | 라우팅 간 head diff 예측 가능<br/>제어 및 해제가 용이 | 초기화/해제 비용, 코드 복잡도 |
| C. iframe 또는 Web Component로 위젯 격리 | Next.js의 DOM과 완전히 독립적<br/>head 충돌 없음 | 도입 난이도 존재, 스타일·크기 조정 필요 |
| D. MutationObserver로 head 조작 감시 후 롤백 | 위젯에 설정 옵션이 없는 경우 대처 가능 | 깜빡임 가능성, 유지보수 어려움 |
5. 주의사항 및 고려점
1. <head> 직접 조작은 금물
Next.js 14 이상에서는 Metadata API를 통해 <title>, <meta>, <link> 태그를 설정해야 하며, 직접 DOM을 조작하는 방식은 권장되지 않습니다.
외부 스크립트가 이를 위반하는 경우, 반드시 격리 또는 복원 처리 로직을 도입해야 합니다.
2. 스크립트 중복 로드 방지
cleanup 로직 없이 위젯이 중복 로드되면, 전역 객체 충돌이나 already initialized 오류가 발생할 수 있습니다. 항상 언마운트 처리 후 재로드하도록 구성해야 합니다.
3. 개발 환경(HMR)에서도 반드시 테스트
Next.js 13.4.10 버전에서는 개발 중 CSS HMR 갱신 도중에도 동일한 removeChild 오류가 발생한 사례가 있습니다. 반드시 개발 서버에서도 동일한 방식으로 테스트가 필요합니다.
🧩 결론 및 요약
문제 원인: 외부 스크립트가 Next.js App Router가 관리하는 <head> 요소를 변경하면서 React의 diff 알고리즘과 충돌
해결 방법:
- 라이브챗 위젯 옵션으로 <head> 조작 비활성화
- React 컴포넌트에서 위젯 mount/unmount 시점에 head 복원
- iframe 또는 Web Component로 위젯 격리
- 최후의 수단: MutationObserver로 head 복원 감시
💡 실무 팁
- 라이브챗과 같은 외부 위젯은 필요한 페이지에서만 로드하고, 전역으로 항상 mount하지 마세요.
- 위젯 초기화 시점과 해제 시점을 명확히 제어하여, head 충돌 및 전역 변수 중복 정의를 방지하세요.
- iframe 방식이 가능하다면 가장 안전하게 DOM 격리를 보장할 수 있습니다.
'programming > Web' 카테고리의 다른 글
| Stripe 를 통해 Apple pay 세팅 - 애플페이 탭 노출 안됨, 테스트 키로 결제시 session 생성 불가 에러 (0) | 2024.07.17 |
|---|---|
| [React] S3 Url 일정 시간 동안 not Found 리턴 되는 경우 Video 처리 방안 (0) | 2024.02.23 |
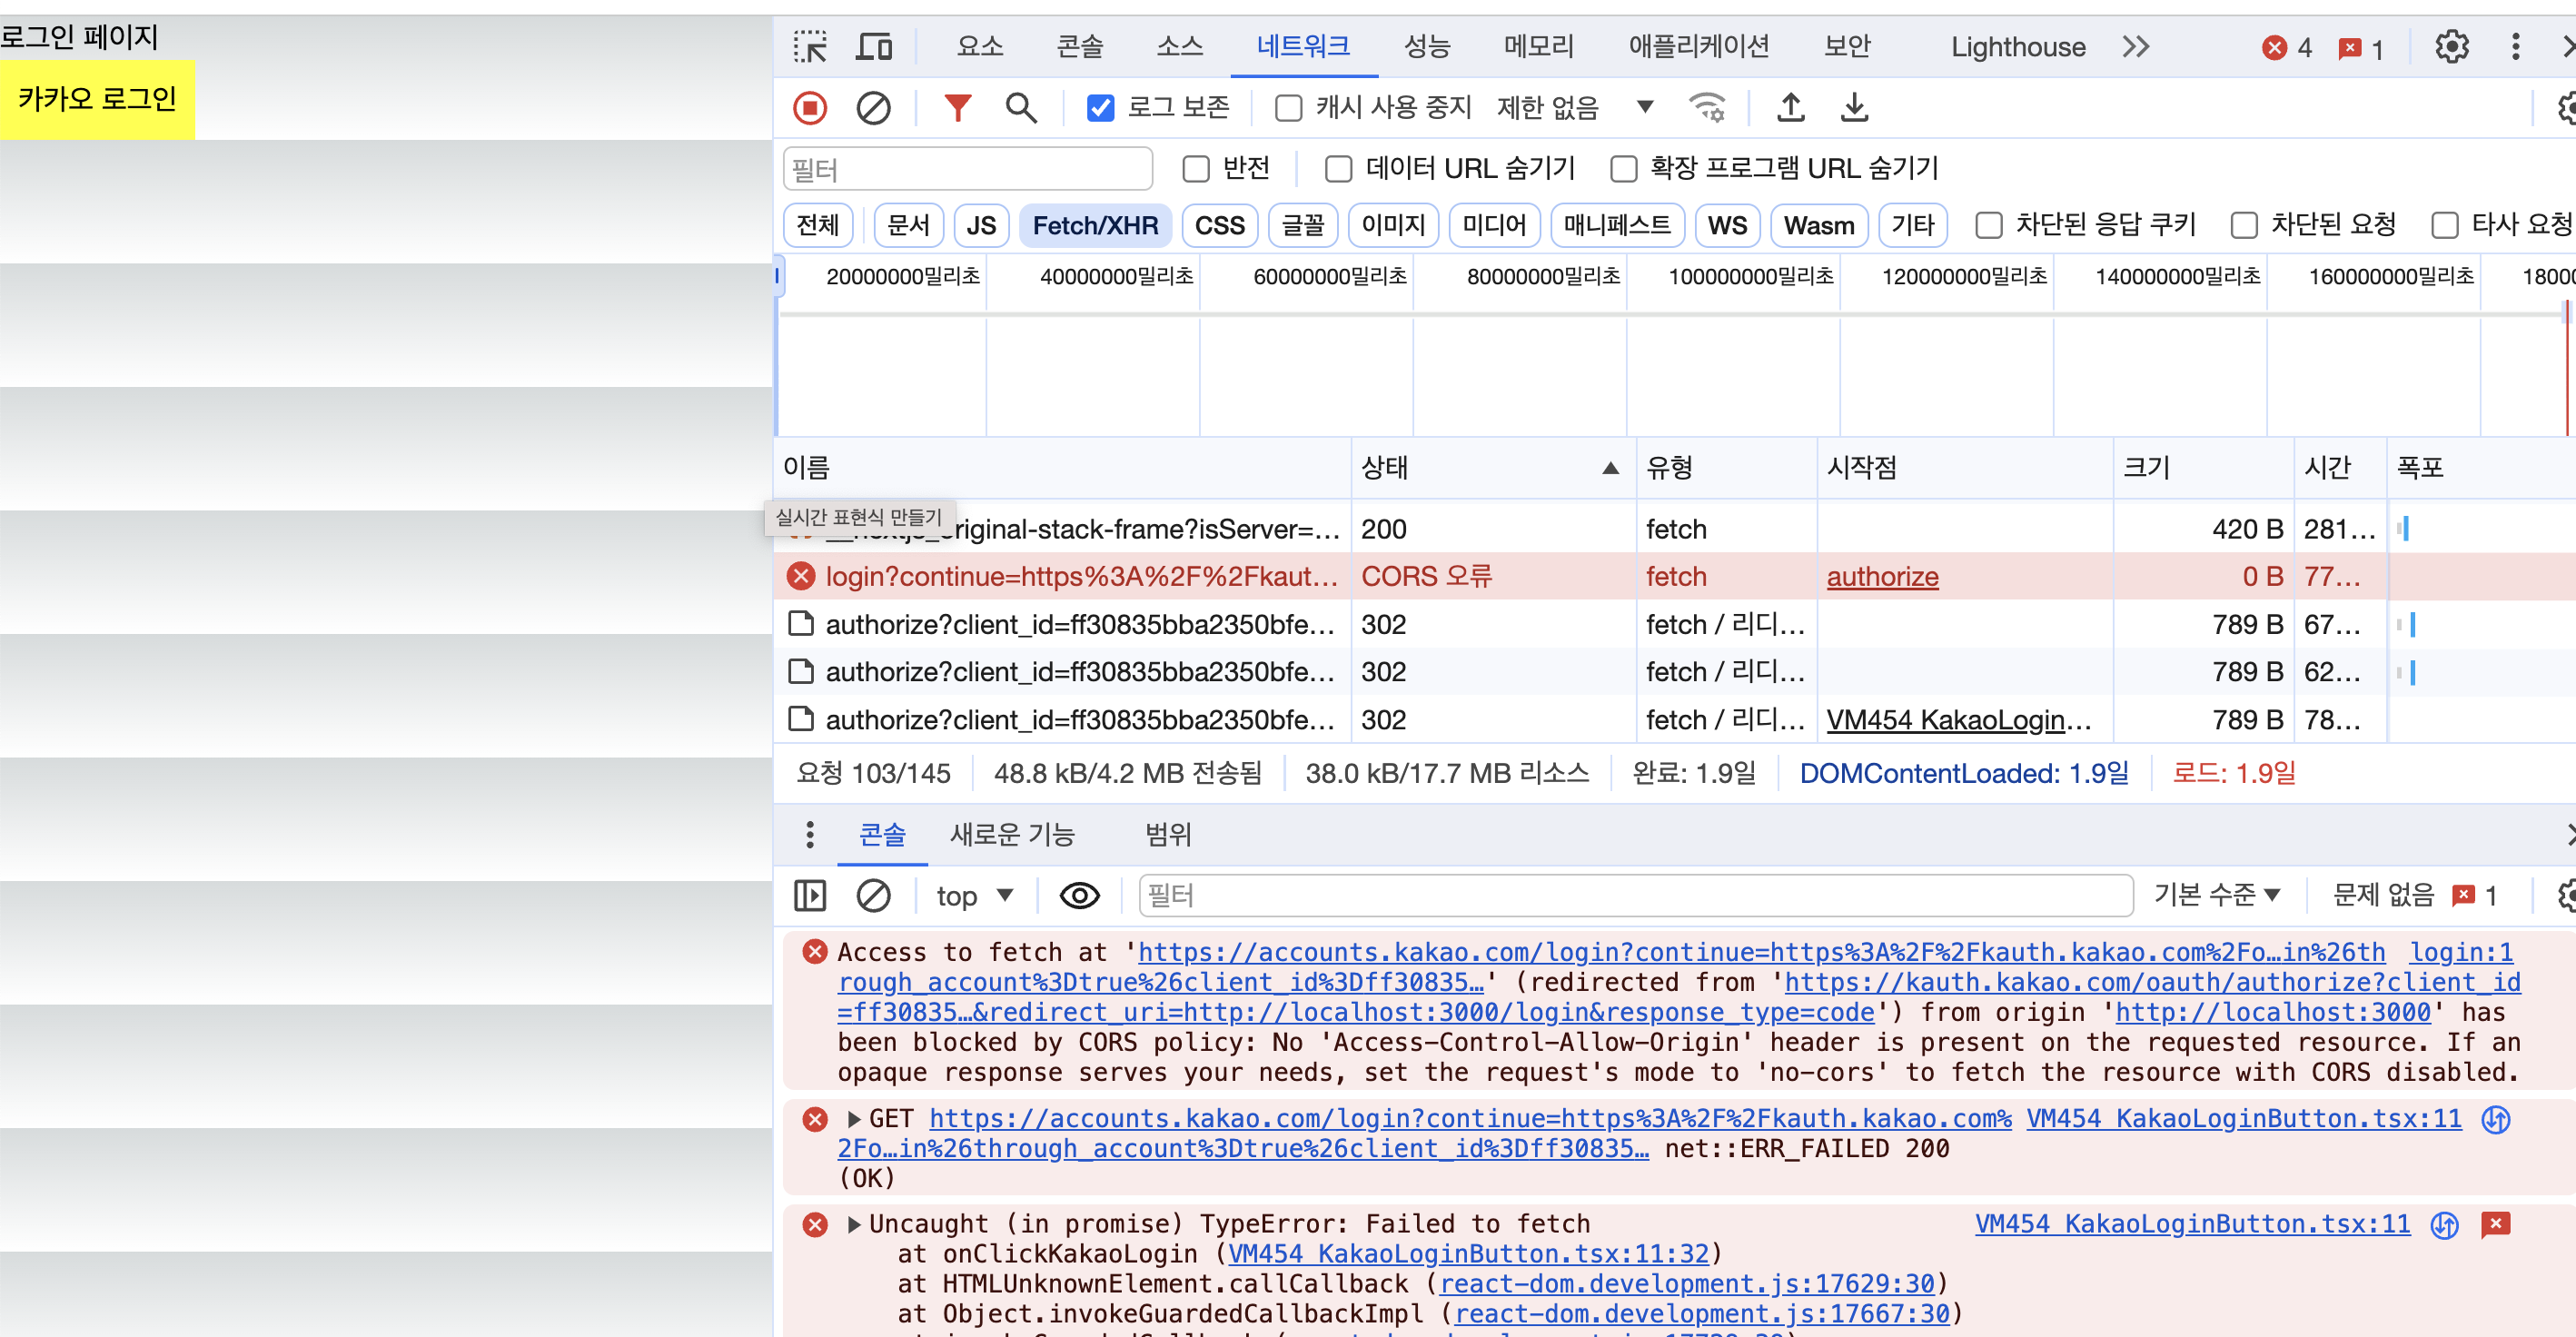
| 소셜 로그인 - 카카오 로그인 CORS 에러 발생할 때 - NextJS (frontend) (1) | 2024.02.07 |
| Frontend 관점 HTTP 응답 상태 코드(RESTful API) (1) | 2024.02.05 |
| JWT 로 로그인 인증 구현하기 (0) | 2023.05.10 |