제목을 어떻게 지어야할 지 고민이었다.


물론 방법을 찾는 과정에서도 검색어를 뭐라고 해야할지도 고민이었다.


일단 하고싶은건, 로컬 변수를 쓰는 페이지나 컴포넌트 내부에 공통으로 자주 쓰이는 함수를 common 화 하는 것이었다.


이전에는 흔하게 functions/common.js 이런식으로 자주 사용되는 함수들을 죄다 모아놓던가 했었다.


함수 별로 각각 사용되는 매개변수들을 일일히 정의하고 넘겨주는 것은 덤이요,,,


최종적으로 선택해서 사용한 방법 Mixins)

redirect to 👉 https://tacit.tistory.com/166


[Nuxt] (mixins 사용법) vue 페이지나 컴포넌트에서 분리된 공통 함수에서 this 사용하기

[Nuxt] Vue 페이지나 컴포넌트에서 분리된 공통 함수 사용하기 [Nuxt] Vue 페이지나 컴포넌트에서 분리된 공통 함수 사용하기 제목을 어떻게 지어야할 지 고민이었다. 물론 방법을 찾는 과정에서도

tacit.tistory.com


⬇️ 아래는 삽질 history ⬇️


예시)

/pages/start.vue : 시작 폼 페이지

<template>
    <form @submit.prevent="submitForm">
        <div class="email-wrapper">
          <label for="email" class="font-15b form-label">이메일</label>
          <input
            v-model="email"
            type="text"
            class="form-input"
            :class="{'input-error': !emailValidation}"
            placeholder="example@domain.com"
            maxlength="100"
            required
            @input="onInputEmail"
          />
          <p v-if="!emailValidation" class="font-15r warning">올바르지 않은 이메일 형식입니다</p>
        </div>

        <div class="phone-wrapper">
          <label for="phone" class="font-15b form-label">연락처</label>
          <input
            v-model="phone"
            class="form-input"
            :class="{'input-error': !phoneValidation}"
            type="text"
            placeholder="010-1234-5678"
            maxlength="20"
            required
            @input="onInputPhone"
          />
          <p v-if="!phoneValidation" class="font-15r warning">올바르지 않은 전화번호 형식입니다</p>
        </div>
        <div class="button-wrapper">
          <button class="font-20b submit-button" type="submit">컨설팅 신청하기</button>
        </div>
    </form>
</template>


동일한 파일(/pages/start.vue) 함수 부분

<script>
export default {
  name: 'Start',
  data() {
    return {
      email: '',
      phone: '',
      emailValidation: true,
      phoneValidation: true,
      phoneFormat
    }
  },
  methods: {
    onInputEmail() {
      this.email = this.email.replace(/[^a-zA-Z0-9@._]*$/gi, '')
      // 이메일 정규식
      const emailRegex = /^[0-9a-zA-Z]([-_.]?[0-9a-zA-Z])*@[0-9a-zA-Z]([-_.]?[0-9a-zA-Z])*\.[a-zA-Z]{2,3}$/
      // 이메일 정규식 부적합
      if (!emailRegex.test(this.email)) {
        this.emailValidation = false
      } else {
        this.emailValidation = true
      }
    },
    onInputPhone() {
      this.phone = this.phoneFormat(this.phone)
      // 휴대폰 정규식
      const phoneRegex = /^\d{2,3}-\d{3,4}-\d{4}$/
      // 휴대폰 정규식 부적합
      if (!phoneRegex.test(this.phone)) {
        this.phoneValidation = false
      } else {
        this.phoneValidation = true
      }
    }
  }
}
</script>


phone / email 정규식 체크하고, 포멧 맞춰주는 일을 하는 함수를 공용화 하고 싶었다.


방법1) 그냥 평소 쓰던 것 처럼 functions/common.js 에 함수들 정의하고 필요한 인자들을 넘겨줘서 값을 리턴 받기

방법2) functions/common.js 안에 함수를 정의 하지만, 인자를 정의하지 않고, vue 스코프 내부의 this를 전체 전달하기

방법3) plugins/common.js 플러그인으로 빼서 전역함수로 inject 하여 this.$phoneCheck() 로 사용하기


방법1) 예시

 // functions/common.js
 
 export const onInputEmail= (email, emailValidation) => {
  email = email.replace(/[^a-zA-Z0-9@._]*$/gi, '')
  // 이메일 정규식
  const emailRegex = /^[0-9a-zA-Z]([-_.]?[0-9a-zA-Z])*@[0-9a-zA-Z]([-_.]?[0-9a-zA-Z])*\.[a-zA-Z]{2,3}$/
  // 이메일 정규식 부적합
  if (!emailRegex.test(this.email)) {
    emailValidation = false
  } else {
    emailValidation = true
  }
  return email, emailValidation
},

// pages/start.vue

import { onInputEmail } from "~/functions/common.js"

this.phone, this.emailValidation = this.onInputEmail(this.phone, this.emailValidation)


- 페이지별로 공통적인 역할을 하는 함수이긴 하지만, 약간씩 달라지는 조건이 있어서, 넘겨줘야할 인자들이 점점 많아지고, 함수 내부에서 분기를 쳐야하는 경우가 생기기도 한다.

- 리턴 받는 값으로 페이지 내부 로컬 변수들에 할당해 주어야한다.

- 참고로 위의 코드가 동작하는지는 모름 ㅋ


방법2) 지역 this 넘겨주기

// functions/common.js


export const phoneValidate = localThis => {
  localThis.phone = localThis.phoneFormat(localThis.phone)
  // 휴대폰 정규식
  const phoneRegex = /^\d{2,3}-\d{3,4}-\d{4}$/
  // 휴대폰 정규식 부적합
  if (!phoneRegex.test(localThis.phone)) {
    localThis.phoneValidation = false
  } else {
    localThis.phoneValidation = true
  }
}

export const emailValidate = localThis => {
  localThis.email = localThis.email.replace(/[^a-zA-Z0-9@._]*$/gi, '')
  // 이메일 정규식
  const emailRegex = /^[0-9a-zA-Z]([-_.]?[0-9a-zA-Z])*@[0-9a-zA-Z]([-_.]?[0-9a-zA-Z])*\.[a-zA-Z]{2,3}$/
  // 이메일 정규식 부적합
  if (!emailRegex.test(localThis.email)) {
    localThis.emailValidation = false
  } else {
    localThis.emailValidation = true
  }
}

페이지, 컴포넌트 에서 사용하기

// pages/start.vue

<template>
    <form>
        <div class="email-wrapper">
          <label for="email" class="font-15b form-label">담당자 이메일</label>
          <input
            v-model="email"
            type="text"
            class="form-input"
            :class="{'input-error': !emailValidation}"
            placeholder="example@domain.com"
            maxlength="100"
            required
            @input="onInputEmail"
          />
          <p v-if="!emailValidation" class="font-15r warning">올바르지 않은 이메일 형식입니다</p>
        </div>

        <div class="phone-wrapper">
          <label for="phone" class="font-15b form-label">담당자 연락처</label>
          <input
            v-model="phone"
            class="form-input"
            :class="{'input-error': !phoneValidation}"
            type="text"
            placeholder="010-1234-5678"
            maxlength="20"
            required
            @input="onInputPhone"
          />
          <p v-if="!phoneValidation" class="font-15r warning">올바르지 않은 전화번호 형식입니다</p>
        </div>
    </form>
</template>

<script>
import {phoneValidate,emailValidate} from '~/functions/common.js'

export default {
  name: 'Start',
  data() {
    return {
      phoneValidate,
      emailValidate,
      email: '',
      phone: '',
      emailValidation: true,
      phoneValidation: true,
      phoneFormat
    }
  },
  methods: {
    onInputEmail() {
      this.emailValicate(this)
    },

    onInputPhone() {
      this.phoneValidate(this)
    },
  }
}
</script>


- 냅다 로컬 this를 넘겨버림

- 리턴 할 필요 없이 분리된 함수에서 바로 this.phone = '1231313' 이런식으로 바로 값을 할당 가능

- 분리된 함수 페이지 (functions/common.js) 내부 함수를 화살표함수로 정의하면 함수가 호출된 부모의 this를 참조하므로 지역 this를 인자로 안넘겨줘도 작동할 것이라고 예상했으나, 그렇지 않았다.

- 넘겨주는 인자 없이 functions/common.js 내부의 phoneValidate() 함수 안에서 console.log(this) 를 하면 undefined 가 떴다.


방법3) plugins

전체적으로 2번과 동일하지만 구현 방법의 약간의 차이가 있을 뿐

플러그인을 사용할 뿐,,


플러그인 파일 생성 (그냥 functions/common.js 같은 역할)


// plugins/common.js

export default (context, inject) => {
  const phoneValidate = localThis => {
    localThis.phone = localThis.phoneFormat(localThis.phone)
    // 휴대폰 정규식
    const phoneRegex = /^\d{2,3}-\d{3,4}-\d{4}$/
    // 휴대폰 정규식 부적합
    if (!phoneRegex.test(localThis.phone)) {
      localThis.phoneValidation = false
    } else {
      localThis.phoneValidation = true
    }
  }
  inject('phoneValidate', phoneValidate)
}


nuxt.config.js에 plugins 등록

기존에 등록되어있는것 그대로 두고, 리스트 형태로 추가 추가 추가


// nuxt.config.js


  // Plugins to run before rendering page: https://go.nuxtjs.dev/config-plugins
  plugins: [
    '~/plugins/axios/interceptors.js',
    '~/plugins/vuex-persistedstate',
    '~/plugins/common.js'
  ],


페이지나 컴포넌트에서 사용하기


// pages/start.vue

<template>
    <form>
        <div class="phone-wrapper">
          <label for="phone" class="font-15b form-label">담당자 연락처</label>
          <input
            v-model="phone"
            class="form-input"
            :class="{'input-error': !phoneValidation}"
            type="text"
            placeholder="010-1234-5678"
            maxlength="20"
            required
            @input="onInputPhone"
          />
          <p v-if="!phoneValidation" class="font-15r warning">올바르지 않은 전화번호 형식입니다</p>
        </div>
    </form>
</template>

<script>
export default {
  name: 'Start',
  data() {
    return {
      phoneValidate,
      phone: '',
      phoneValidation: true,
      phoneFormat
    }
  },
  methods: {
    onInputPhone() {
      this.$phoneValidate(this)
    },
  }
}
</script>


- 별도의 import 없이 this.$함수명으로 접근하여 사용할 수 있다.

- input 태그에서 @input=$phoneValidate(this) 로 바로 사용은 불가능 했다.


결론적으로 localThis를 통째로 넘겨주는 방법으로 구현을 할 수 있다는걸 알게 되었으나,,

왜 화살표 함수를 썼는데 호출부의 this 를 읽지 못하는지,

왜 @input 함수에서 바로 사용하지 못하는지, 


해결해야할 의문이 남아있다


to be...continue...(?)

[TODO]

- page/test.vue


test 페이지 안에서 form 데이터들(name, phone, email 등등) 을 변수로 관리하고,

그 데이터들을 모아서 백엔드로 전달


input 태그 가 특정 컴포넌트로 쌓여서 template에 바로 쓰이지 않고, 하위 컴포넌트 안에 들어가야함


[SOLUTION#1]

- emit으로 하위 컴포넌트 데이터(e.target.value) 를 상위 컴포넌트(page/test.vue) 로 전달

# 상위 컴포넌트 (pages/test.vue)

<template>
	<SearchInput
	  :search-keyword="searchKeyword"
	  @input="updateSearchKeyword"
	></SearchInput>
</template>


<script>
methods: {
  updateSearchKeyword(keyword) {
    this.searchKeyword = keyword
  }
}
</script>
# 하위 컴포넌트 (components/SearchInput.vue)

<template>
  <div>
    <input
      type="text"
      :value="searchKeyword"
      @input="$emit('input', $event.target.value)"
    />
    <button type="button" @click="$emit('search')">search</button>
  </div>
</template>

<script>
export default {
  props: {
    searchKeyword: {
      type: String,
      default: () => '',
    },
  },
}
</script>


[SOLUTION#2]

- v-model 사용

# 상위 컴포넌트 (pages/test.vue)

<template>
	<SearchInput
		v-model="searchKeyword"
	  :search-keyword="searchKeyword"
	></SearchInput>
</template>


<script>
</script>
# 하위 컴포넌트 (components/SearchInput.vue)

<template>
  <div>
    <input
      type="text"
      :value="value"
      @input="$emit('input', $event.target.value)"
    />
    <button type="button" @click="$emit('search')">search</button>
  </div>
</template>

<script>
export default {
  props: {
    value: {
      type: String,
      default: () => '',
    },
  },
}
</script>

[TODO]

입력 Form 에서 사용자가 Yes / No 중 Yes 라고 답하면 상세 내역을 적기 위한 textarea 를 보여주어야 한다


[WHAT I DONE]

- "YES" 버튼을 클릭시 setAnswerY 메소드를 실행하여 this.answer_y = true 로 세팅

- this.answer_y 값이 true 이면 <textarea v-if="answer_y">

- textarea 요소가 보이고 focus 도 자동으로 이동


[첫번째 시도]

setAnswerY() {
    this.answer_n = false
    this.answer_y = true
    // 마우스 커서 이동
    this.setFocus('inputText')
},

setFocus(item) {
	this.$refs[item].focus()
},


✔️ 결과

answer_y=true 로 바꾸는 즉시 DOM이 업데이트 되지 않아서 $ref 요소를 찾을 수 없음

Because Vue is trying to optimize and batch changes, it won't immediately update the DOM when we set isEditing to false. So when we call focusOnEdit(), the "Edit" Button has not been rendered yet.


[두번째 시도]

- setTimeout을 이용한 시간차

setAnswerY() {
    this.answer_n = false
    this.answer_y = true
    // 마우스 커서 바로 이동
    setTimeout(() => {
    	this.setFocus('inputText')
    }, 200)
    this.setFocus('inputText')
},

setFocus(item) {
    this.$refs[item].focus()
    this.$nextTick(() => {
    const itemRef = this.$refs[item]
    	itemRef.focus()
    })
},


✔️ 결과

구현은 되었으나 임시방편같은 느낌,,


[세번째 시도] -> BEST❣️

- Vue의 nextTick() 메소드 사용

setAnswerY() {
  this.answer_n = false
  this.answer_y = true
  // 마우스 커서 바로 이동
  this.setFocus('inputText')
},

setFocus(item) {
  this.$nextTick(() => {
    const itemRef = this.$refs[item]
    itemRef.focus()
  })
},


✔️ 결과 

Vue의 nextTick() 메소드를 사용하여 DOM이 재렌더링 된 이후 $ref.focus 잡도록 처리

Instead, we need to wait until after Vue undergoes the next DOM update cycle. To do that, Vue components have a special method called $nextTick(). This method accepts a callback function, which then executes after the DOM updates.


[추가 시도]


v-show & v-if 의 차이점


v-show는 일단 내부적으로 렌더링은 하되 display : none / block 으로 조정

v-if 상태값에 따라 그때그때 렌더링 여부가 결정됨

하지만, v-show를 써도 마찬가지로 DOM이 업데이트 될 때까지 nextTick() 메소드로 기다려야함


[specific concept]

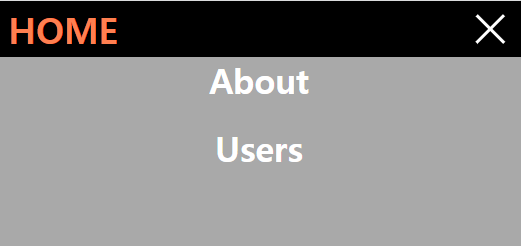
1. 조건에 따라 class 값 추가/제거

- isOpened라는 boolean 변수의 값에 따라 open 추가/없음 토글 됨

- @click 속성으로 toggleMenu 함수 실행됨

<div id="hamburger-icon" :class="{open: isOpened}" @click="toggleMenu">


[예제 코드]

1. /componets/NavBar.vue 만들기

<template>
<header>
  <div id="brand"><router-link to="/">HOME</router-link></div>
  <nav>
    <ul>
      <li><router-link to="/about">About</router-link></li>
      <li><router-link to="/user">Users</router-link></li>
    </ul>
  </nav>
  <div id="hamburger-icon" :class="{open: isOpened}" @click="toggleMenu">
    <div class="bar1"></div>
    <div class="bar2"></div>
    <div class="bar3"></div>
    <ul class="mobile-menu">
      <li><router-link to="/about">About</router-link></li>
      <li><router-link to="/user">Users</router-link></li>
    </ul>
  </div>
</header>
</template>

<script>
export default {
  data() {
    return {
      isOpened : false
    }
  },
  methods: {
    toggleMenu() {
      this.isOpened = !this.isOpened
    }
  }
}
</script>

<style>
* {
  margin: 0;
  padding: 0;
}
body {
  background-color: darkgray;
}
header {
  display: flex;
  justify-content: space-between;
  align-items: center;
  height: 50px;
  background-color: black;
  padding: 0 10px;
}
header a {
  text-decoration: none;
}
ul {
  display: flex;
  list-style: none;
  gap: 20px;
}
li a {
  color: white;
}
#hamburger-icon {
  display: none;
  cursor: pointer;
}
#hamburger-icon div {
  width: 35px;
  height: 3px;
  background-color: white;
  margin: 6px 0;
}
.open .bar1 {
  transform: rotate(-45deg) translate(-6px, 7px);
}
.open .bar2 {
  opacity: 0;
}
.open .bar3 {
  transform: rotate(45deg) translate(-6px, -7px);
}
#brand {
  font-size: 32px;
  font-weight: 700;
}
#brand a {
  color: coral;
}
.mobile-menu {
  display: none;
}
@media only screen and (max-width: 600px) {
  header nav {
    display: none;
  }

  #hamburger-icon {
    display: block;
  }
}
</style>


2. App.vue 템플릿 상단 NavBar 추가하기

<script setup>
import CardList from './components/CardList.vue'
import NavBar from './components/NavBar.vue'
</script>

<template>
  <!-- <CardList/> -->
  <!-- <div>
    <router-link to="/">HOME</router-link>
    <router-link to="/about">About</router-link>
    <router-link to="/user">Users</router-link>
  </div> -->
  <NavBar />
  <div>
    <router-view></router-view>
  </div>
</template>

<style>
* {
  padding : 0px;
  margin : 0px;
}
</style>


[실행결과]

1. main.js

props로 받겠다 true 설정

import { createApp } from 'vue'
import { createWebHistory, createRouter } from 'vue-router';
import App from './App.vue'
// router 쓰일 Component
import Home from './views/Home.vue';
import About from './views/About.vue';
import User from './views/User.vue';
import UserDetail from './views/UserDetail.vue';

//routes 정하기
const routes = [    
  { path : '/', component: Home, name:"home"},
  { path : '/about', component: About, name:'about2' },
  { path : '/user', component: User },
  { path : '/user/:id', component: UserDetail, props: true },
]

const router = createRouter({
  history: createWebHistory(),
  routes
})

const app = createApp(App)
app.use(router)
app.mount('#app')


2. /view/UserDetail.vue

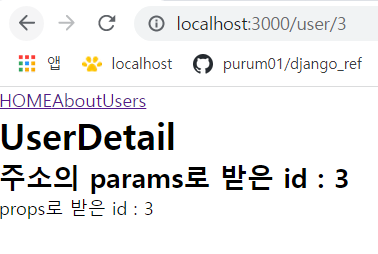
- params로 받거나

- props로 받기 가능

<template>
<h1>UserDetail</h1>
<h2>주소의 params로 받은 id : {{ $route.params.id }}</h2>
<div>props로 받은 id : {{ id }}</div>
</template>

<script>
export default {
  props : {
    id : String
  }
}
</script>


[실행결과]

1. view 폴더생성

2. 페이지 생성(About.vue, Home.vue, User.vue, UserDetail.vue)

// About.vue 내용 (Home, User, UserDetail 모두 동일)

<template>
About
</template>


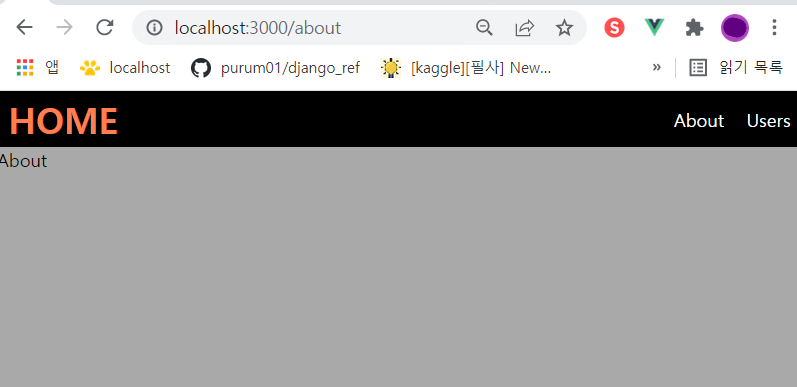
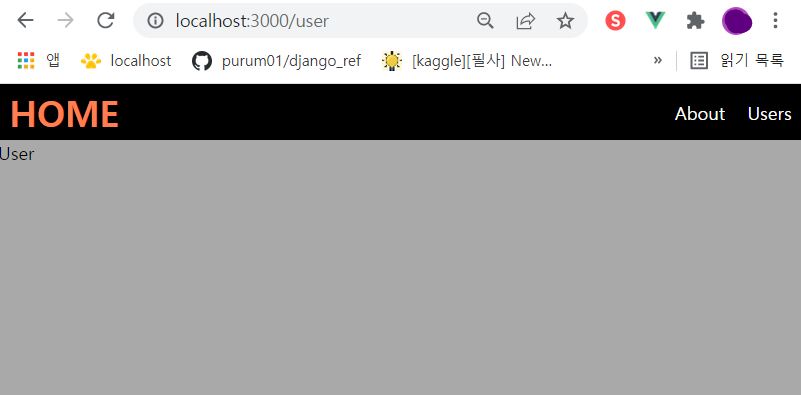
3. main.js : routing 내용 설정

import { createApp } from 'vue';
import { createWebHistory, createRouter } from 'vue-router';
import App from './App.vue'
// router 쓰일 Component
import Home from './views/Home.vue';
import About from './views/About.vue';
import User from './views/User.vue';
import UserDetail from './views/UserDetail.vue';

//routes 정하기
const routes = [    
  { path : '/', component: Home },
  { path : '/about', component: About },
  { path : '/user', component: User },
  { path : '/user/:id', component: UserDetail },
]

const router = createRouter({
  history: createWebHistory(),
  routes
})

const app = createApp(App)
app.use(router)
app.mount('#app')


4. App.vue 에 링크 생성

<script setup>
import CardList from './components/CardList.vue'
</script>

<template>
  <!-- <CardList/> -->
  <div>
    <router-link to="/">HOME</router-link>
    <router-link to="/about">About</router-link>
    <router-link to="/user">Users</router-link>
  </div>
  <div>
    <router-view></router-view>
  </div>
</template>

<style>
* {
  padding : 0px;
  margin : 0px;
}
</style>


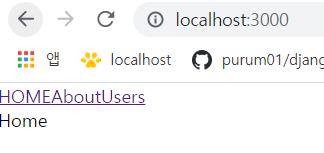
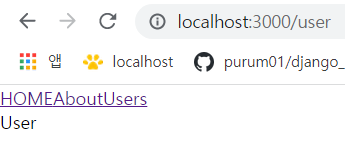
[실행결과]

computed 안에서 지정한 color 값을 css에서 받아와서 표현하기


그냥 조건에 따라 color 값을 바꾸고 싶을 때


v-bind를 사용한다


[예시코드]

<script>
export default {
  props : {
    imgUrl : String,
    name : String,
    birth : String,
  },
  computed : {
    compareBirth() {
      console.log("ComparedBirth invoked in computed")
      if(Date.parse(this.birth) < Date.parse('1970-01-01')) {
        this.color = 'green'
        return 'older'
      }else {
        this.color = 'red'
        return 'younger'
      }
    }
  },
}
</script>

<template>
<div class="card">
  <img :src="imgUrl" alt="profile image" class="card__img">
  <h2 class="card__name">{{ name }}</h2>
  <h2 class="card__birth">{{ birth }}</h2>
  <h2>{{ compareBirth }}</h2>
  <h2>{{ compareBirth }}</h2>
</div>
</template>

<style scoped>
.card {
  display: flex;
  flex-direction: column;
  justify-content: center;
  align-items: center;
  gap : 10px;
  width : 200px;
  height : 250px;
  background-color: aquamarine;
  box-shadow: 1px 1px 10px grey;
}
.card__img {
  width : 100px;
  height: 100px;
  object-fit: cover;
  border-radius: 100%;
  border : solid 2px;
  padding : 5px;
  background-color: white;
}
.card__name{
  font-weight: 700;
}
.card__birth{
  font-weight: 300;
  color : v-bind(color);
}
</style>


[실행결과]

1. computed : 뷰에서 제공

- 캐시가 가능함

- 호출시 이전에 계산했던 것을 사용

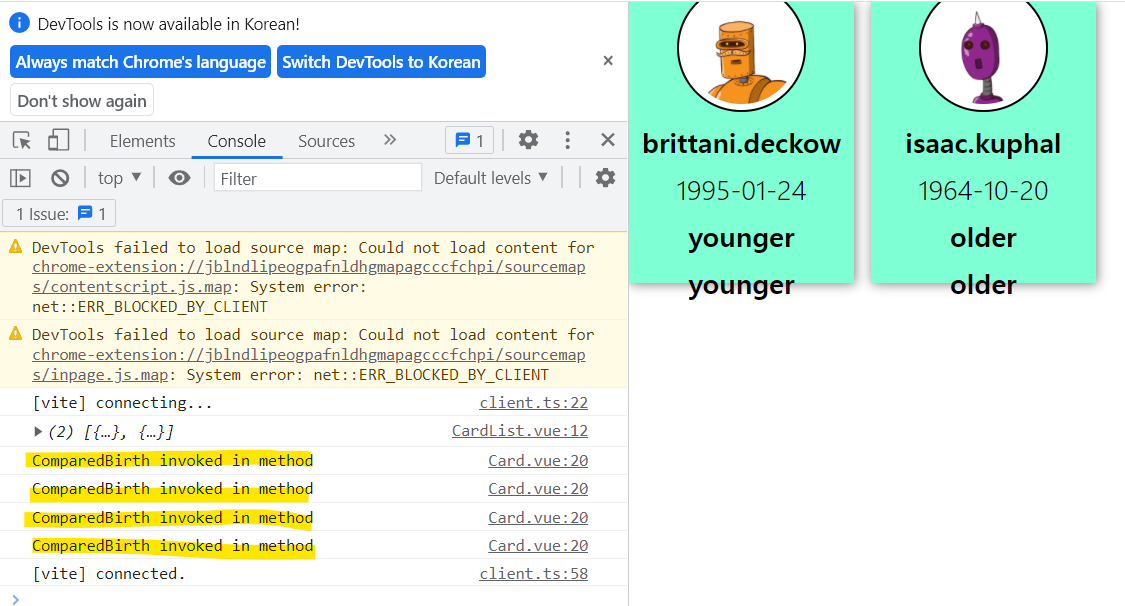
- console.log 찍힌 횟수를 확인해보자

- 호출시 compareBirth 형태로 호출

<script>
export default {
  props : {
    imgUrl : String,
    name : String,
    birth : String,
  },
  computed : {
    compareBirth() {
      console.log("ComparedBirth invoked in computed")
      if(Date.parse(this.birth) < Date.parse('1970-01-01')) {
        return 'older'
      }else {
        return 'younger'
      }
    }
  },
  // methods : {
  //   compareBirth() {
  //     console.log("ComparedBirth invoked in method")
  //     if(Date.parse(this.birth) < Date.parse('1970-01-01')) {
  //       return 'older'
  //     }else {
  //       return 'younger'
  //     }
  //   }
  // }
}
</script>

<template>
<div class="card">
  <img :src="imgUrl" alt="profile image" class="card__img">
  <h2 class="card__name">{{ name }}</h2>
  <h2 class="card__birth">{{ birth }}</h2>
  <h2>{{ compareBirth }}</h2>
  <h2>{{ compareBirth }}</h2>
</div>
</template>

<style scoped>
.card {
  display: flex;
  flex-direction: column;
  justify-content: center;
  align-items: center;
  gap : 10px;
  width : 200px;
  height : 250px;
  background-color: aquamarine;
  box-shadow: 1px 1px 10px grey;
}
.card__img {
  width : 100px;
  height: 100px;
  object-fit: cover;
  border-radius: 100%;
  border : solid 2px;
  padding : 5px;
  background-color: white;
}
.card__name{
  font-weight: 700;
}
.card__birth{
  font-weight: 300;
}
</style>

[실행결과 (computed)]


2. methods : 뷰에서 제공

- 캐시가 안됨

- 호출시 매번 연산

- console.log 찍힌 횟수를 확인해보자

- 호출시 compareBirth() 형태로 호출

<script>
export default {
  props : {
    imgUrl : String,
    name : String,
    birth : String,
  },
  // computed : {
  //   compareBirth() {
  //     console.log("ComparedBirth invoked in computed")
  //     if(Date.parse(this.birth) < Date.parse('1970-01-01')) {
  //       return 'older'
  //     }else {
  //       return 'younger'
  //     }
  //   }
  // },
  methods : {
    compareBirth() {
      console.log("ComparedBirth invoked in method")
      if(Date.parse(this.birth) < Date.parse('1970-01-01')) {
        return 'older'
      }else {
        return 'younger'
      }
    }
  }
}
</script>

<template>
<div class="card">
  <img :src="imgUrl" alt="profile image" class="card__img">
  <h2 class="card__name">{{ name }}</h2>
  <h2 class="card__birth">{{ birth }}</h2>
  <h2>{{ compareBirth() }}</h2>
  <h2>{{ compareBirth() }}</h2>
</div>
</template>

<style scoped>
.card {
  display: flex;
  flex-direction: column;
  justify-content: center;
  align-items: center;
  gap : 10px;
  width : 200px;
  height : 250px;
  background-color: aquamarine;
  box-shadow: 1px 1px 10px grey;
}
.card__img {
  width : 100px;
  height: 100px;
  object-fit: cover;
  border-radius: 100%;
  border : solid 2px;
  padding : 5px;
  background-color: white;
}
.card__name{
  font-weight: 700;
}
.card__birth{
  font-weight: 300;
}
</style>


[실행결과(methods)]

1. 프로젝트 내에 components/Card.vue 파일 생성

# components/Card.vue

<script>
export default {
  props : {
    imgUrl : String,
    name : String,
    description : String,
  }
}
</script>

<template>
<div class="card">
  <img :src="imgUrl" alt="profile image" class="card__img">
  <h2 class="card__name">{{ name }}</h2>
  <h2 class="card__description">{{ description }}</h2>
</div>
</template>

<style scoped>
.card {
  display: flex;
  flex-direction: column;
  justify-content: center;
  align-items: center;
  gap : 10px;
  width : 200px;
  height : 250px;
  background-color: aquamarine;
  box-shadow: 1px 1px 10px grey;
}
.card__img {
  width : 100px;
  height: 100px;
  object-fit: cover;
  border-radius: 100%;
  border : solid 2px;
  padding : 5px;
  background-color: white;
}
.card__name{
  font-weight: 700;
}
.card__description{
  font-weight: 300;
}
</style>


2. 프로젝트 내에 components/CardList.vue 파일 생성

# components/CardList.vue

<script>
import Card from "./Card.vue"
export default {
  data() {
    return {
      heros: [
        {
          id : 1,
          imgUrl : 'loki.jpg',
          name : "loki",
          description : 'Younger Brother'
        },
        {
          id : 2,
          imgUrl : 'thor.jpg',
          name : "thor",
          description : 'Older Brother'
        }
      ]
    }
  },
  components : { Card }
}
</script>

<template>
  <div class="card-list">
    <Card
      v-for="hero of heros"
      :imgUrl="hero.imgUrl"
      :name="hero.name"
      :description="hero.description"
      :key="hero.id"
    ></Card>
  </div>
</template>

<style>
.card-list{
  display: flex;
  gap : 15px;
}
</style>


3. 최상위 컴포넌트 App.vue 수정

# App.vue
<script setup>
import CardList from './components/CardList.vue'
</script>

<template>
  <CardList/>
</template>

<style>
* {
  padding : 0px;
  margin : 0px;
}
</style>


4. 원하는 이미지 파일 넣기(loki.png, thor.png)

/public 폴더 밑에 이미지 파일 추가

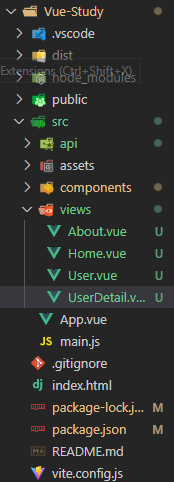
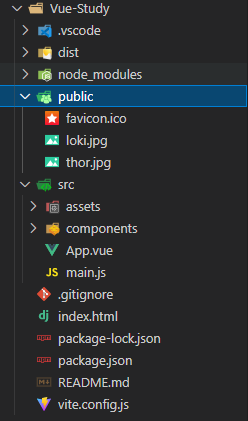
5. 최종 파일트리

6. dev 서버 돌리기

npm run dev


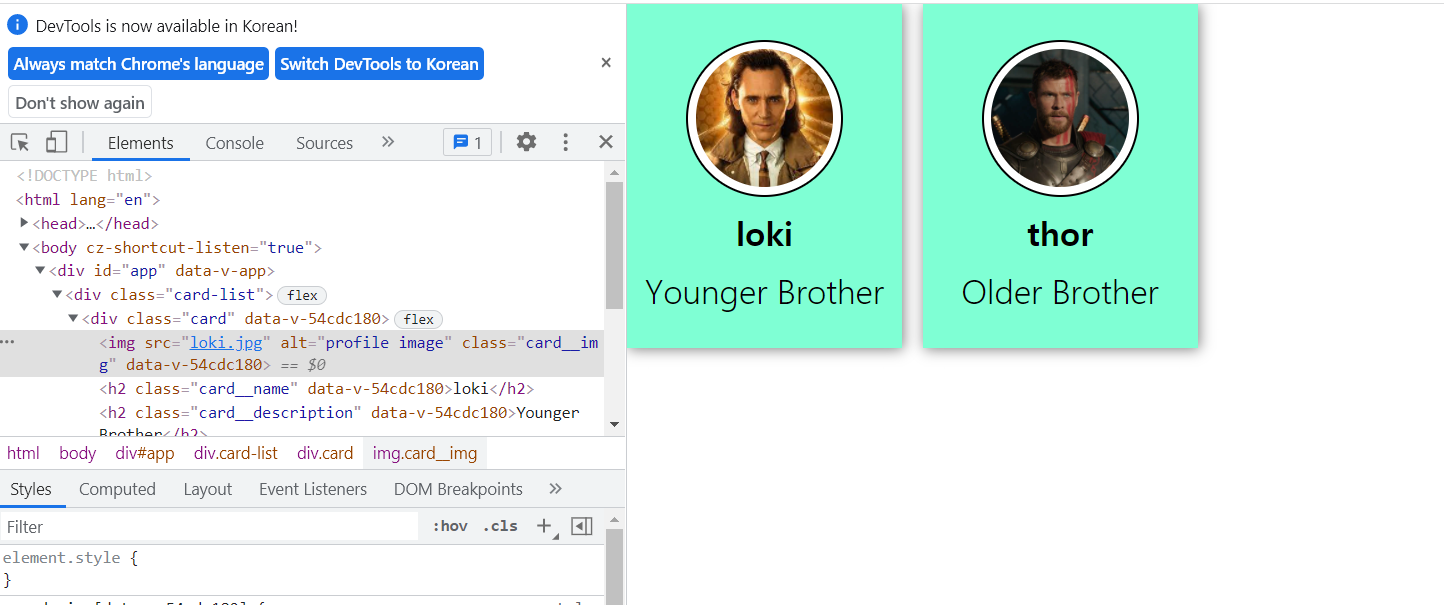
[실행 결과]

https://vitejs-kr.github.io/guide/


시작하기 | Vite

시작하기 들어가기 전에 Vite(프랑스어로 "빠르다(Quick)"를 의미하며, 발음은 "veet"와 비슷한 /vit/ 입니다.)은 빠르고 간결한 모던 웹 프로젝트 개발 경험에 초점을 맞춰 탄생한 빌드 도구이며, 두

vitejs-kr.github.io

vite로 시작하기 (Vue 에서 권장)

$ npm create vite
npx: 6개의 패키지를 3.697초만에 설치했습니다.
√ Project name: ... Vue-Study
√ Package name: ... vue-study
√ Select a framework: » vue
√ Select a variant: » vue

Scaffolding project in C:\workspace\vuejs\Vue-Study...

Done. Now run:

  cd Vue-Study
  npm install
  npm run dev


VSCODE extension 설치


설치 후 dir 구조


1. components 안에 필요한 컴포넌트들을 정의한다. => HelloWorld.vue

2. App.vue => 최상위 부모 컴포넌트

3. main.js => App.vue를 html에 마운트

4. index.html => 정적 html 문서


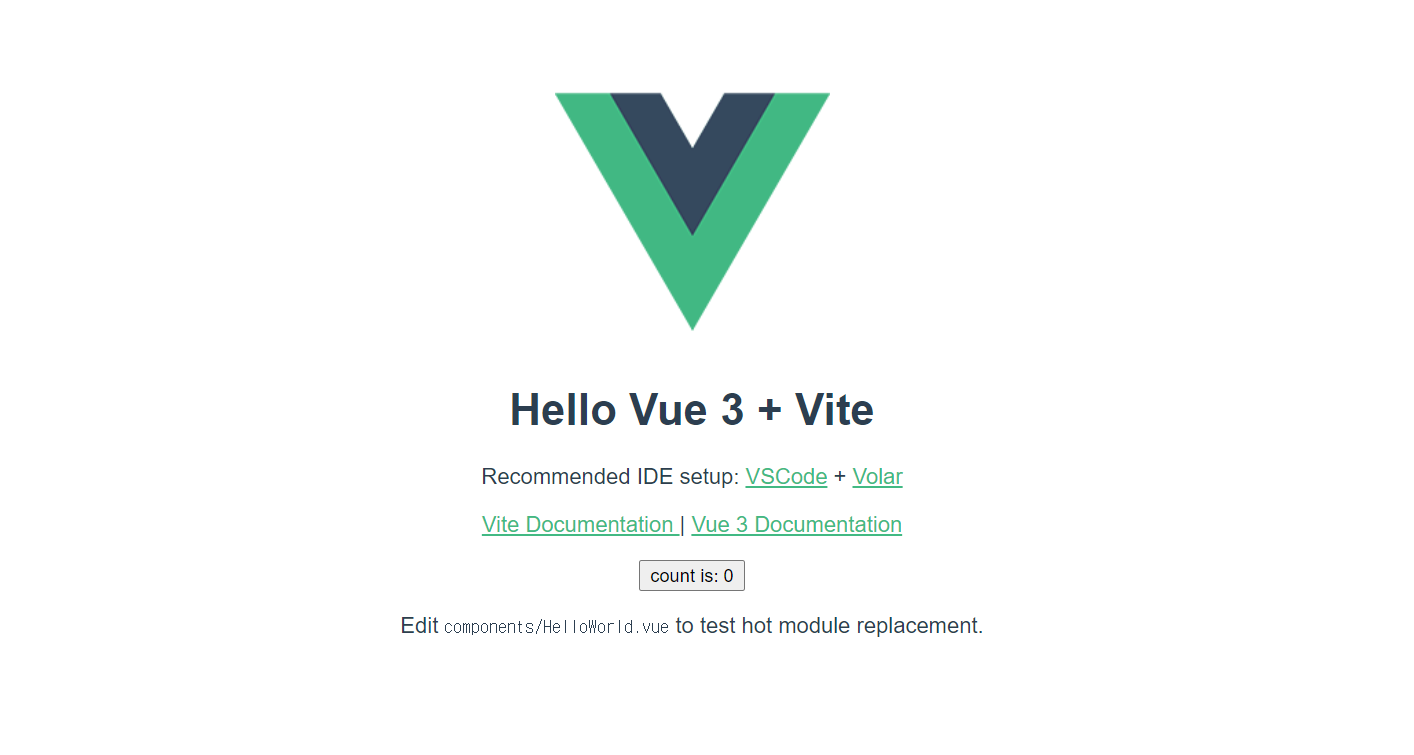
dev 서버 돌려보기

npm install
npm run dev


개발 이후 build

$ npm run build

> vue-study@0.0.0 build C:\vuejs\Vue-Study
> vite build

vite v2.8.6 building for production...
✓ 14 modules transformed.
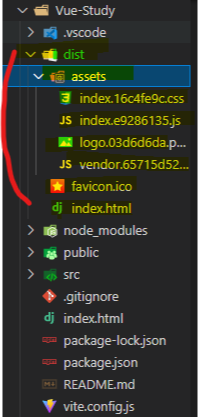
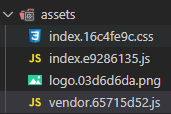
dist/assets/logo.03d6d6da.png    6.69 KiB
dist/index.html                  0.48 KiB
dist/assets/index.e9286135.js    1.87 KiB / gzip: 1.00 KiB
dist/assets/index.16c4fe9c.css   0.20 KiB / gzip: 0.17 KiB
dist/assets/vendor.65715d52.js   50.24 KiB / gzip: 20.19 KiB

새로 생긴 폴더 구조 (dist)

bundler가 만들어준다.

왜?

1) 사이즈를 줄이기 위해

2) 커넥션 수를 줄이기 위해 (파일 여러개를 하나로)

3) index / vendor 나눌 수 있다.

  - index : 내가 짠 코드들이 들어가 있음, 바뀌는 경우가 많다. 

  - vendor : 사용한 패키지들, 바뀌는 경우가 별로 없음 -> 캐시를 적용 가능

코드 수정 후 다시 build 하면 해시값이 바뀌는 것을 확인할 수 있다. (App.vue 파일만 수정했음)

브라우저에서 캐시(저장)해둔 값과 달라진 경우만 다운로드


+ Recent posts