정리할 내용
- Google Identity 간단 개념 (+ oauth) 👉 링크
- 구글 라이브러리에서 변경되는 내용 👉 링크
- authorization 에서 flow 선택 (gsi/client 라이브러리 사용)
- 라이브러리를 사용하지 않고 googl oauth api로 direct 요청하기
- 토이플젝을 통해서 code → token 얻어내는 과정 및 유의사항
- 기존 로그인 플로우 & 변경되는 로그인 플로우 설명
Google Identity Options(선택지)
이번 포스팅에서는 Sigin + API (목적은 access_token으로 구글 API 사용하기) -> 새로운 라이브러리 gsi/client 를 사용하는 구현방법에 대해서 정리해보려 한다.

authorization 의 flow
- 지금 파트가 어디(authentication / authorization) 인지 다시 한 번 확인하는게 좋다 (자꾸 헷갈림)
- 지금은 authorization : 권한 부여 파트이다
- authorization 의 목적은 access_token을 얻어내는것
- 여기까지 하고, authorization 에는 2가지 구현 방식이 있다 (링크)
- implicit flow
- authorization code flow
- 각 flow의 특징, 장단점을 고려하여 본인에게 맞는걸 고른다
1. implicit flow
- initTokenClient 메소드를 사용한다
- 최종 목적인 access_token을 바로 프론트에서 callback으로 받는다
const client = google.accounts.oauth2.initTokenClient({
  client_id: 'YOUR_GOOGLE_CLIENT_ID',
  scope: '<https://www.googleapis.com/auth/calendar.readonly>',
  callback: (response) => {
    ...
  },
});
- 실제 response
{
	access_token : "ya29.a0AX9GBOb_lSF_zh------WGisUOHP52EkyhtLRIyMOA0163",
	authuser : "0",
	expires_in : 3599,
	hd : "kr.hello.com",
	prompt : "none",
	scope : "email profile <https://www.googleapis.com/auth/contacts.readonly>",
	token_type : "Bearer"
}
전체 코드 보기👇
더보기
implicit.html
<!DOCTYPE html>
<html>
  <head>
    <script
      src="https://accounts.google.com/gsi/client"
      onload="initClient()"
      async
      defer
    ></script>
  </head>
  <body>
    <script>
      var client;
      var access_token;

      function initClient() {
        client = google.accounts.oauth2.initTokenClient({
          client_id:
            "174709277496-j4------------8i8g6agnffjj.apps.googleusercontent.com",
          scope: "email profile",
          callback: (response) => {
            console.log("google oauth", response);
            access_token = response.access_token;
            fetch("http://localhost:5000/implicit-callback", {
              method: "POST",
              body: JSON.stringify(response),
              headers: new Headers({
                "Content-Type": "application/json",
              }),
            }).then((res) => console.log(res));
          },
        });
      }
      function getToken() {
        client.requestAccessToken({ prompt: "" });
      }
      function revokeToken() {
        google.accounts.oauth2.revoke(access_token, () => {
          console.log("access token revoked");
        });
      }

      function loadPeople() {
        var xhr = new XMLHttpRequest();
        xhr.open(
          "GET",
          "https://people.googleapis.com/v1/people/me?personFields=emailAddresses,names"
        );
        xhr.setRequestHeader("Authorization", "Bearer " + access_token);
        xhr.send();
      }
    </script>
    <h1>Google Identity Services Authorization Token model</h1>
    <button onclick="getToken();">Get access token</button><br /><br />
    <button onclick="revokeToken();">Revoke token</button>

    <button onclick="loadPeople();">Use access token</button>
  </body>
</html>- requestAccessToken() 메소드를 사용하여 access_token 요청
- requestAccessToken() 메소드에서 특정 params 값을 재설정 할 수 있다
- prompt 를 빈 스트링(””) 값을 넣으면 동의항목에 대해서 한번만 물어본다
- 브라우저로 받은 access_token을 브라우저에서 바로 사용할 수 있다
- loadPeople() 함수에서 헤더에 access_token을 담아서 people api를 사용할 수 있다
app.js
// node_modules 에 있는 express 관련 파일을 가져온다.
var express = require("express");
var bodyParser = require("body-parser");
const { google } = require("googleapis");
const url = require("url");
var request = require("request");

// express 는 함수이므로, 반환값을 변수에 저장한다.
var app = express();
// parse application/x-www-form-urlencoded
app.use(bodyParser.urlencoded({ extended: false }));
// parse application/json
app.use(bodyParser.json());

// 5000 포트로 서버 오픈
app.listen(5000, function () {
  console.log("start! express server on port 5000");
});

// localhost:5000/implicit 브라우저에 res.sendFile() 내부의 파일이 띄워진다.
app.get("/implicit", function (req, res) {
  res.sendFile(__dirname + "/public/implicit.html");
});

// implicit flow : get user info with access_token
app.post("/implicit-callback", async function (req, res) {
  console.log("implicit-callback");
  const options = {
    uri: "https://people.googleapis.com/v1/people/me?personFields=emailAddresses,names",
    method: "GET",
    headers: {
      Authorization: "Bearer " + req.body.access_token,
    },
  };
  request.get(options, function (error, response, body) {
    if (error) console.log(error);
    console.log(response.statusCode);
    console.log(body);
  });
  res.status(200).send("ok");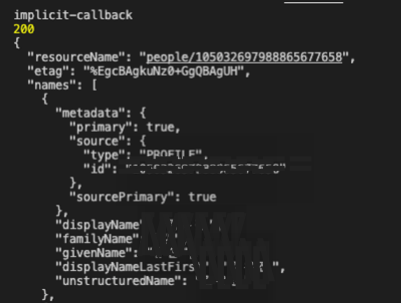
});- 프론트에서 /implicit-callback 으로 넘긴 access_token을 사용하여 people api를 이용할 수도 있다
- 백엔드 콘솔 response
2. authorization code flow
- initCodeClient 메소드를 사용한다
- 구글 계정을 선택하는 UX를 Popup 창을 띄우거나, 페이지를 redirect 시킬 수 있다
- authorization code를 먼저 받고 → 그 코드를 가지고 한번 더 google 에 요청하여 최종 목적인 access_token을 받는 방식이다
- popup의 경우 callback 함수의 response로 authorization_code를 받는다
const client = google.accounts.oauth2.initCodeClient({
  client_id: 'YOUR_GOOGLE_CLIENT_ID',
  scope: '<https://www.googleapis.com/auth/calendar.readonly>',
  ux_mode: 'popup',
  callback: (response) => {
    const xhr = new XMLHttpRequest();
    xhr.open('POST', code_receiver_uri, true);
    xhr.setRequestHeader('Content-Type', 'application/x-www-form-urlencoded');
    // Set custom header for CRSF
    xhr.setRequestHeader('X-Requested-With', 'XmlHttpRequest');
    xhr.onload = function() {
      console.log('Auth code response: ' + xhr.responseText);
    };
    xhr.send('code=' + response.code);
  },
});
- redirect의 경우 미리 지정해둔 redirect uri로 response 로 authorization_code 를 받는다
const client = google.accounts.oauth2.initCodeClient({
  client_id: 'YOUR_GOOGLE_CLIENT_ID',
  scope: '<https://www.googleapis.com/auth/calendar.readonly>',
  ux_mode: 'redirect',
  redirect_uri: "<https://your.domain/code_callback_endpoint>",
  state: "YOUR_BINDING_VALUE"
});
- 실제 response
{
  code: '4/0AWgavdf--------ucnY14Ud_qNu9A37g',
  scope: 'email profile <https://www.googleapis.com/auth/calendar.readonly> <https://www.googleapis.com/auth/contacts.readonly> <https://www.googleapis.com/auth/drive.metadata.readonly> <https://www.googleapis.com/auth/calendar.events.readonly> openid <https://www.googleapis.com/auth/userinfo.profile> <https://www.googleapis.com/auth/userinfo.email>',
  authuser: '0',
  hd: 'kr.hello.com',
  prompt: 'consent'
}
- 받은 authorization_code를 이용하여 access_token을 발급받아야한다
POST /token HTTP/1.1
Host: oauth2.googleapis.com/token
Content-Type: application/x-www-form-urlencoded

code=4/P7q7W9---------IaQm6bTrgtp7&
client_id=your_client_id&
client_secret=your_client_secret&
redirect_uri=https%3A//mysite.example.com/code&
grant_type=authorization_code
- response 를 확인하면 access_token, refresh_token, id_token 가 있다
전체 코드 보기👇
더보기
authorizationCode.html (popup 모드)
<!DOCTYPE html>
<html>
  <head> </head>
  <body>
    <script>
      var client;
      function initClient() {
        client = google.accounts.oauth2.initCodeClient({
          client_id:
            "174709277496-j4nblfbu-------agnffjj.apps.googleusercontent.com",
          scope: "email profile",
          ux_mode: "popup",
          callback: (response) => {
            console.log(response);
            fetch("http://localhost:5000/callback", {
              method: "POST",
              body: JSON.stringify(response),
              headers: new Headers({
                "Content-Type": "application/json",
              }),
            }).then((res) => console.log(res));
          },
        });
      }
      // Request an access token
      function getAuthCode() {
        // Request authorization code and obtain user consent
        client.requestCode();
      }
    </script>
    <button onclick="getAuthCode();">requestCode</button>
    <!-- //구글 api 사용을 위한 스크립트 -->
    <script
      src="https://accounts.google.com/gsi/client"
      onload="initClient()"
      async
      defer
    ></script>
  </body>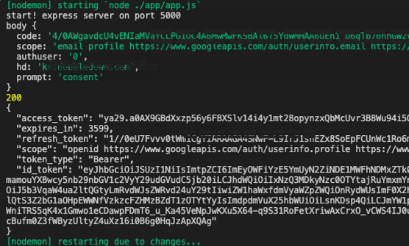
</html>- requestCode() 메소드를 사용하여 authorization_code를 요청
- popup 모드로 한 경우 callback 함수의 response 로 받는다
- 받은 response를 그대로 백엔드 /callback 으로 보낸다
- 받은 response를 그대로 백엔드 /callback 으로 보낸다
app.js (popup 모드)
- 프론트에서 post로 보냈기 때문에 post로 받는다
- google oauth 로 보낼때 아래와 같은 쿼리스트링을 맞춰주어야 한다
- Q) redirect_uri 값을 보내는 곳과 맞춰줘야하는지? 확실히 모르겠다
- 백엔드에서 저기로 페이지를 이동시켜주는 것은 아님 확인
// authorizaion code using popup mode relay endpoint
app.post("/callback", async function (req, res) {
  console.log("body", req.body);
  const options = {
    uri: "https://oauth2.googleapis.com/token",
    method: "POST",
    qs: {
      code: req.body.code,
      client_id:
        "174709277496-j4n---------a8i8g6agnffjj.apps.googleusercontent.com",
      client_secret: "GOCSPX-lO8--------------_Atdn",
      redirect_uri: "http://localhost:5000",
      grant_type: "authorization_code",
    },
    headers: {
      "Content-Type": "application/x-www-form-urlencoded",
    },
  };
  let token;
  request.post(options, function (error, response, body) {
    if (error) console.log(error);
    token = JSON.parse(body);
    console.log(token);
    res.status(200).send(token.access_token);
  });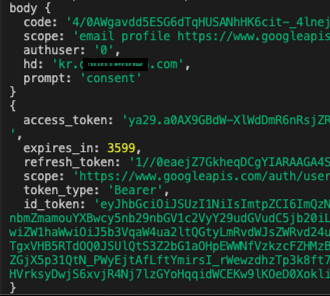
});- backend response
- access_token, refresh_token, id_token 전체 받아옴 확인
authorizationCode.html (redirect 모드)
<!DOCTYPE html>
<html>
  <head> </head>
  <body>
    <script>
      var client;
      function initClient() {
        client = google.accounts.oauth2.initCodeClient({
          client_id:
            "174709277496-j4nb------------g6agnffjj.apps.googleusercontent.com",
          scope: "email profile",
          ux_mode: "redirect",
          redirect_uri: "http://localhost:5000/callback",
        });
      }
      // Request an access token
      function getAuthCode() {
        // Request authorization code and obtain user consent
        client.requestCode();
      }
    </script>
    <button onclick="getAuthCode();">requestCode</button>
    <!-- //구글 api 사용을 위한 스크립트 -->
    <script
      src="https://accounts.google.com/gsi/client"
      onload="initClient()"
      async
      defer
    ></script>
  </body>
</html>- requestCode() 메소드를 사용하여 authorization_code를 요청
- redirect 모드로 한 경우 지정한 redirect_uri 로 구글 oauth 서버에서 바로 보내준다
app.js (redirect 모드)
// authorization code using redierct mode redirect callback
app.get("/callback", async function (req, res) {
  let q = url.parse(req.url, true).query;
  // Get access and refresh tokens (if access_type is offline)
  const options = {
    uri: "https://oauth2.googleapis.com/token",
    method: "POST",
    qs: {
      code: q.code,
      client_id:
        "174709277496-j4---------------agnffjj.apps.googleusercontent.com",
      client_secret: "GOCS------------------zaGRA_Atdn",
      redirect_uri: "http://localhost:5000/callback",
      grant_type: "authorization_code",
    },
    headers: {
      "Content-Type": "application/x-www-form-urlencoded",
    },
  };
  let token;
  request.post(options, function (error, response, body) {
    if (error) console.log(error);
    token = JSON.parse(body);
    console.log(token);
    res.status(200).send(token.access_token);
  });
});- 쿼리파라미터로 받기 때문에 url을 파씽하여 code(authorization_code) 값을 걸러낸다
- google oauth 서버에서 “GET” 요청으로 보내준다
- 걸러낸 코드를 oauth 서버에 access_token 으로 바꿔달라고 요청한다
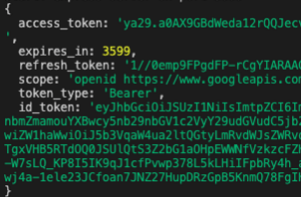
- redirect 모드에서 서버쪽 “redirect_uri” 는 반드시 최초 프론트에서 요청했던 redirect_uri와 같은 값이어야 한다 → popup 모드에서와는 다르게 동작하는 것으로 보임
- 백엔드 response
'programming > Web' 카테고리의 다른 글
| 구글 로그인 라이브러리 변경 - 4. 라이브러리를 사용하지 않고 google OAuth 로 direct 요청 방식 구현 (1) | 2023.01.23 |
|---|---|
| 구글 로그인 라이브러리 변경 - 2. 구글 로그인 라이브러리에서 변경되는 내용 (0) | 2023.01.22 |
| 구글 로그인 라이브러리 변경 - 1. Google Identity OAuth 개념 (0) | 2023.01.18 |
| REST API 메서드 예시 (GET/POST/PUT/PATCH) (0) | 2022.08.21 |
| [Express] Post로 JSON 데이터 보내기 (미들웨어 설정) (0) | 2022.08.20 |


